- Регистрация
- 22.01.2019
- Сообщения
- 1 818
- Благодарностей
- 4 057
- Баллы
- 113

|
| ZennoDroid Pro is out of beta testing! |
Friends!
We are pleased to announce the final release of the multithreaded version of ZennoDroid Pro


It means that the program goes to the permanent version, where we have fixed all the critical bugs.
- Explore new traffic sources
- Create accounts which you cannot create from a regular browser
- Automate any actions in the Android apps and get hundreds of times higher results than your business competitors
ZennoPoster Pro is already available for purchase in your personal account.
Price
ZennoDroid Lite $97
ZennoDroid Pro $197
If you have never used ZennoDroid download the demo version.
Buy now
Upgrades
I already have the Lite-version
You can upgrade your version via Personal Account.
The price of the Lite -> Pro upgrade is $97, including the remaining subscription days.
For example, you have 60 days of subscription left and you want to upgrade to ZennoDroid Pro.
Then the price will be: ($197 — $100) * (60 days / 365 days) = $16.44
I don’t have a license yet
When upgrading, the discount will be about 70% of the cost of the existing version, including the remaining subscription days. For example, you have ZennoDroid Lite with 310 days of subscription left and you want to upgrade to ZennoDroid Pro. Then the price will be: ($197 — $97 * (~0.7)) * (310 days / 365 days) = $109
Upgrade
Android emulation in multiple threads – ZennoDroid Pro
Description
It means that you will be able to solve interesting tasks on the Android platform, launching dozens of project in parallel! The number of threads is unlimited; everything depends only on the resources of your hardware.
How to use multithreading?
One program thread can only work with one copy of the emulator. It means that you need to create as many copies of emulator as you intend to use threads, plus additional one for ProjectMaker. How to do it?
- Calculate, how many Virtual Machines (VM) you have enough memory for.
- Create one VM in MEmu yourself. It is necessary for Project Maker.
- At the start of the project add the «Create Virtual Machine».
- The second step is to select virtual machine.
- Start the VM using “Start/Reload”.
- Delete the VM using “Remove” action if you no longer need it.
- Select a VM (specific or random from existing ones).
- Choose the “Select” action and use the VM.
Example of calculating requirements:
For example, you have 16GB of RAM. The OS + programs take about 4 GB. Therefore, about 12 GB is available. If you create 2GB VM, you can create 6 of them – 5 for ZennoDroid and 1 for Project Maker.
The first step is to create a virtual machine.
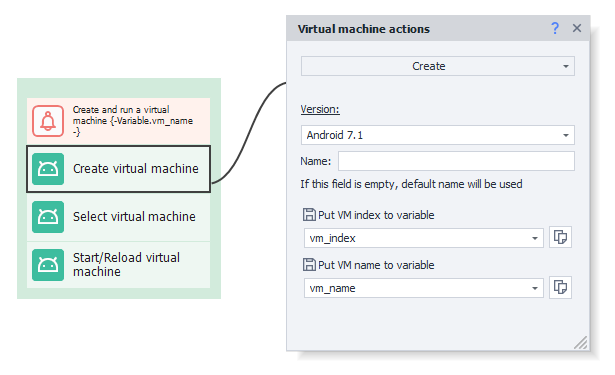
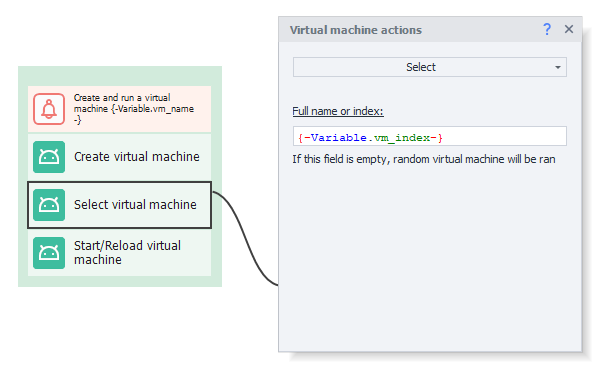
Next, we need to choose which machine we want to run. Then use the "Select" action and put a variable with the index or name of the newly created VM.
If this field is empty, random VM will be ran.
And the final step is to start our virtual machine.
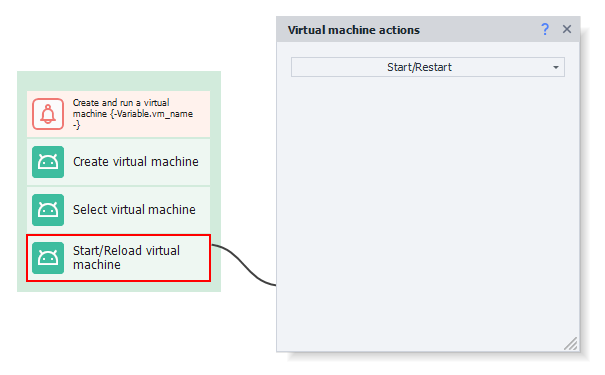
Using this logic in multithreaded mode, each thread will create a separate VM for itself and work with it.
______________________________________________________
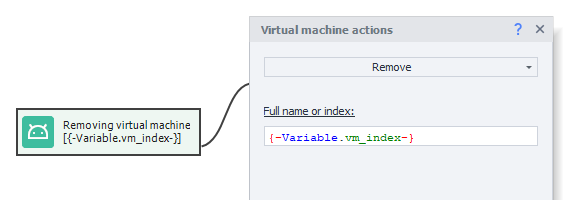
Delete VM using “Remove” action if you no longer need it.

Next, we need to choose which machine we want to run. Then use the "Select" action and put a variable with the index or name of the newly created VM.
If this field is empty, random VM will be ran.

And the final step is to start our virtual machine.

Using this logic in multithreaded mode, each thread will create a separate VM for itself and work with it.
______________________________________________________
Delete VM using “Remove” action if you no longer need it.

Includes all the benefits of ZennoPoster 7

We have updated the code editor component. It increased the stability of the operation, eliminated many minor bugs, made more user-friendly.
In addition, we have updated the C# compiler from version 5.0 to 7.3. You can get more information about new available program features on the official website docs.microsoft.com:

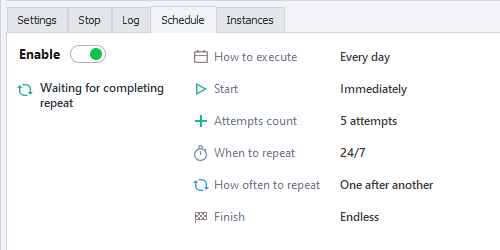
Set up a schedule of any complexity: deadlines, time intervals, and the repeated actions.
Learn more about schedule settings

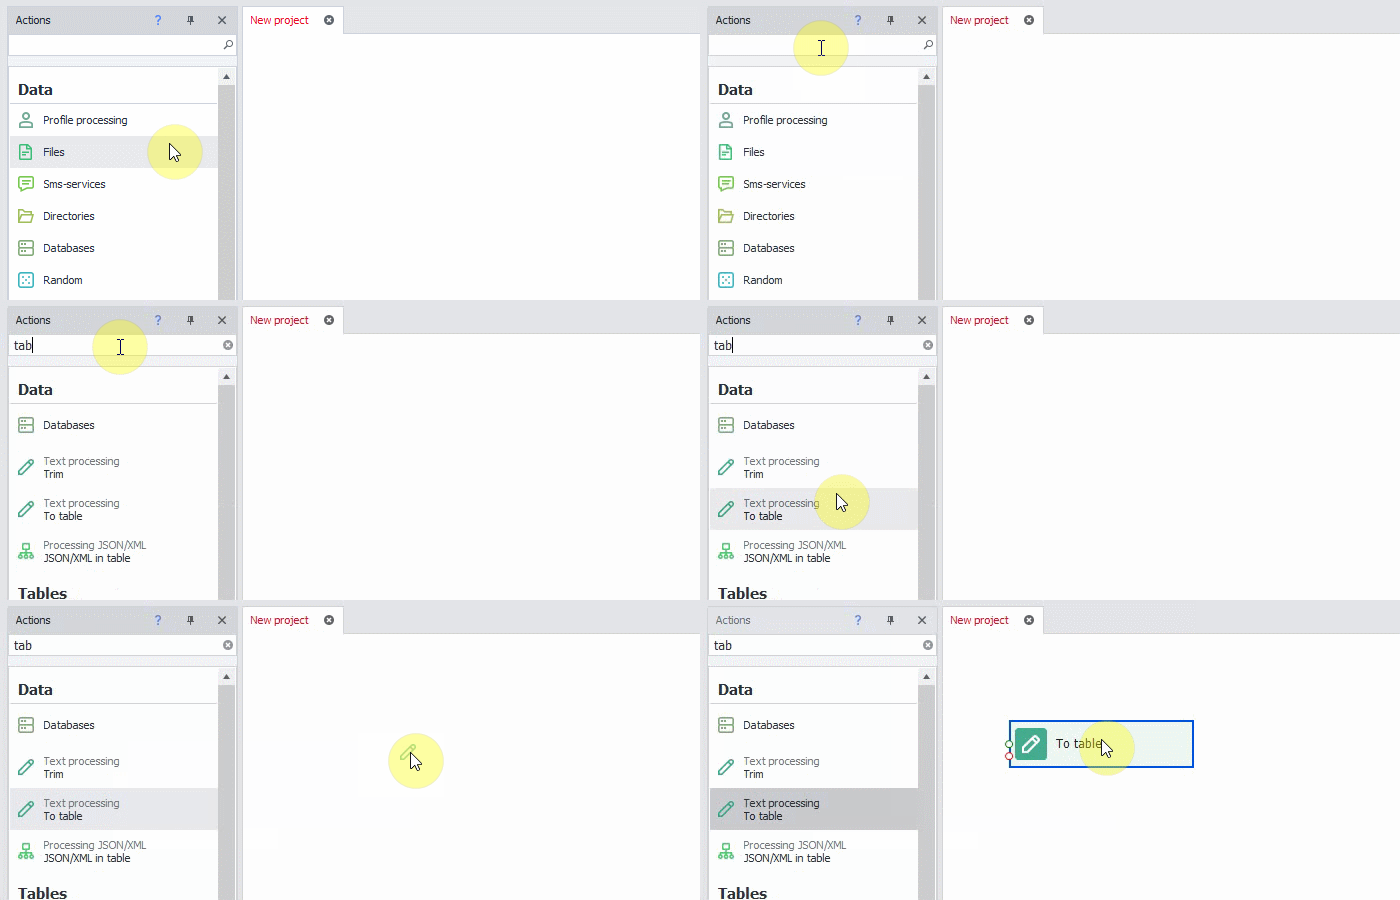
You don’t need to remember the location or name of the actions and functions. New action panel has really “smart search”. Start typing the action you want to find and you'll see the most relevant action with the selected option. Just move it to the project using enter, double click or drag&drop.

- Keep data in Google-sheets which is available to all templates
- Set up data parsing in the sheet and view the result from your phone
- Create user-friendly reports for your clients that are easy to share
- Organize online monitoring
- And many other opportunities that open with a long-awaited integration of Google Sheets

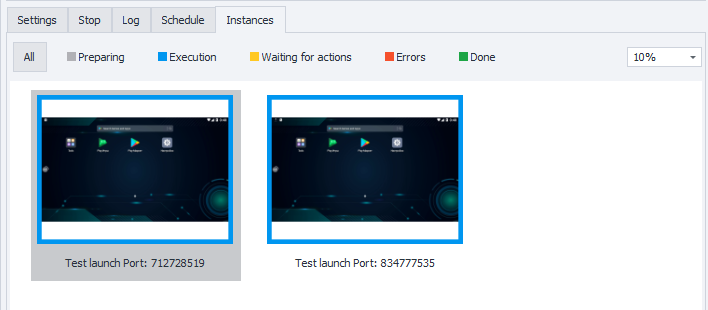
A new mode for displaying thumbnails of all running emulators, where you can watch the running threads in one tab.
Each project has a tab “Instances”, which displays images of all the running threads of the project in real time with the execution status:
- Preparing
- Execution
- Waiting for actions
- Errors
- Done

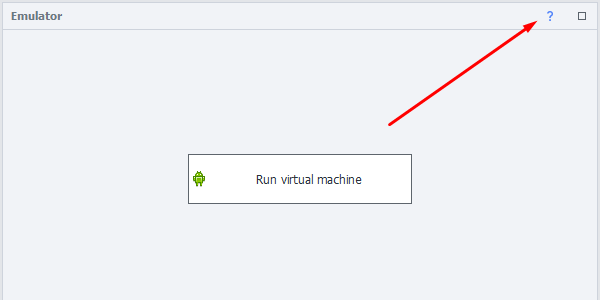
We have integrated help information to the ProjectMaker, you can find it by the icon in almost any window. Click it and you will see information about the tool or the selected action. This will be helpful for all users who are just start using the program or take their first steps in Android automation.
We have not written and updated all the articles yet, but it will be useful to have some reference materials at hand right now.

Customize the program for yourself: 14 themes, including a dark one to relieve tension from the eyes at night. Customize the menu and window layout.
Learn more about interface customization

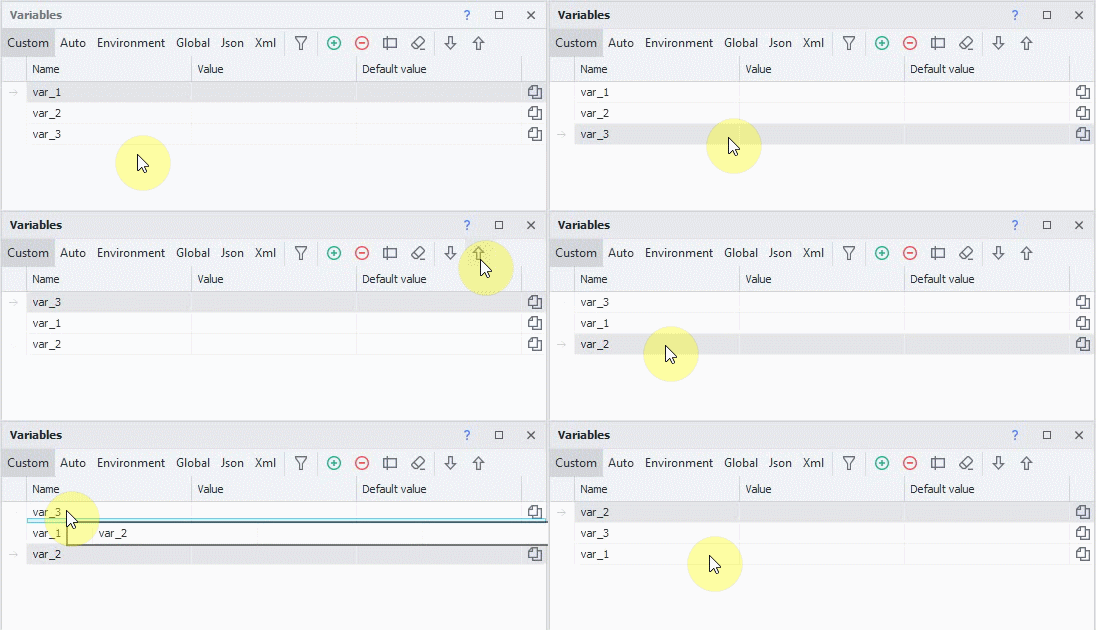
We have added the ability to sort variables in ProjectMaker manually: with the cursor or with the «Up» and «Down» buttons. You should disable sorting by columns in order the program works right (to do this, click on the «Clear sorting» button).

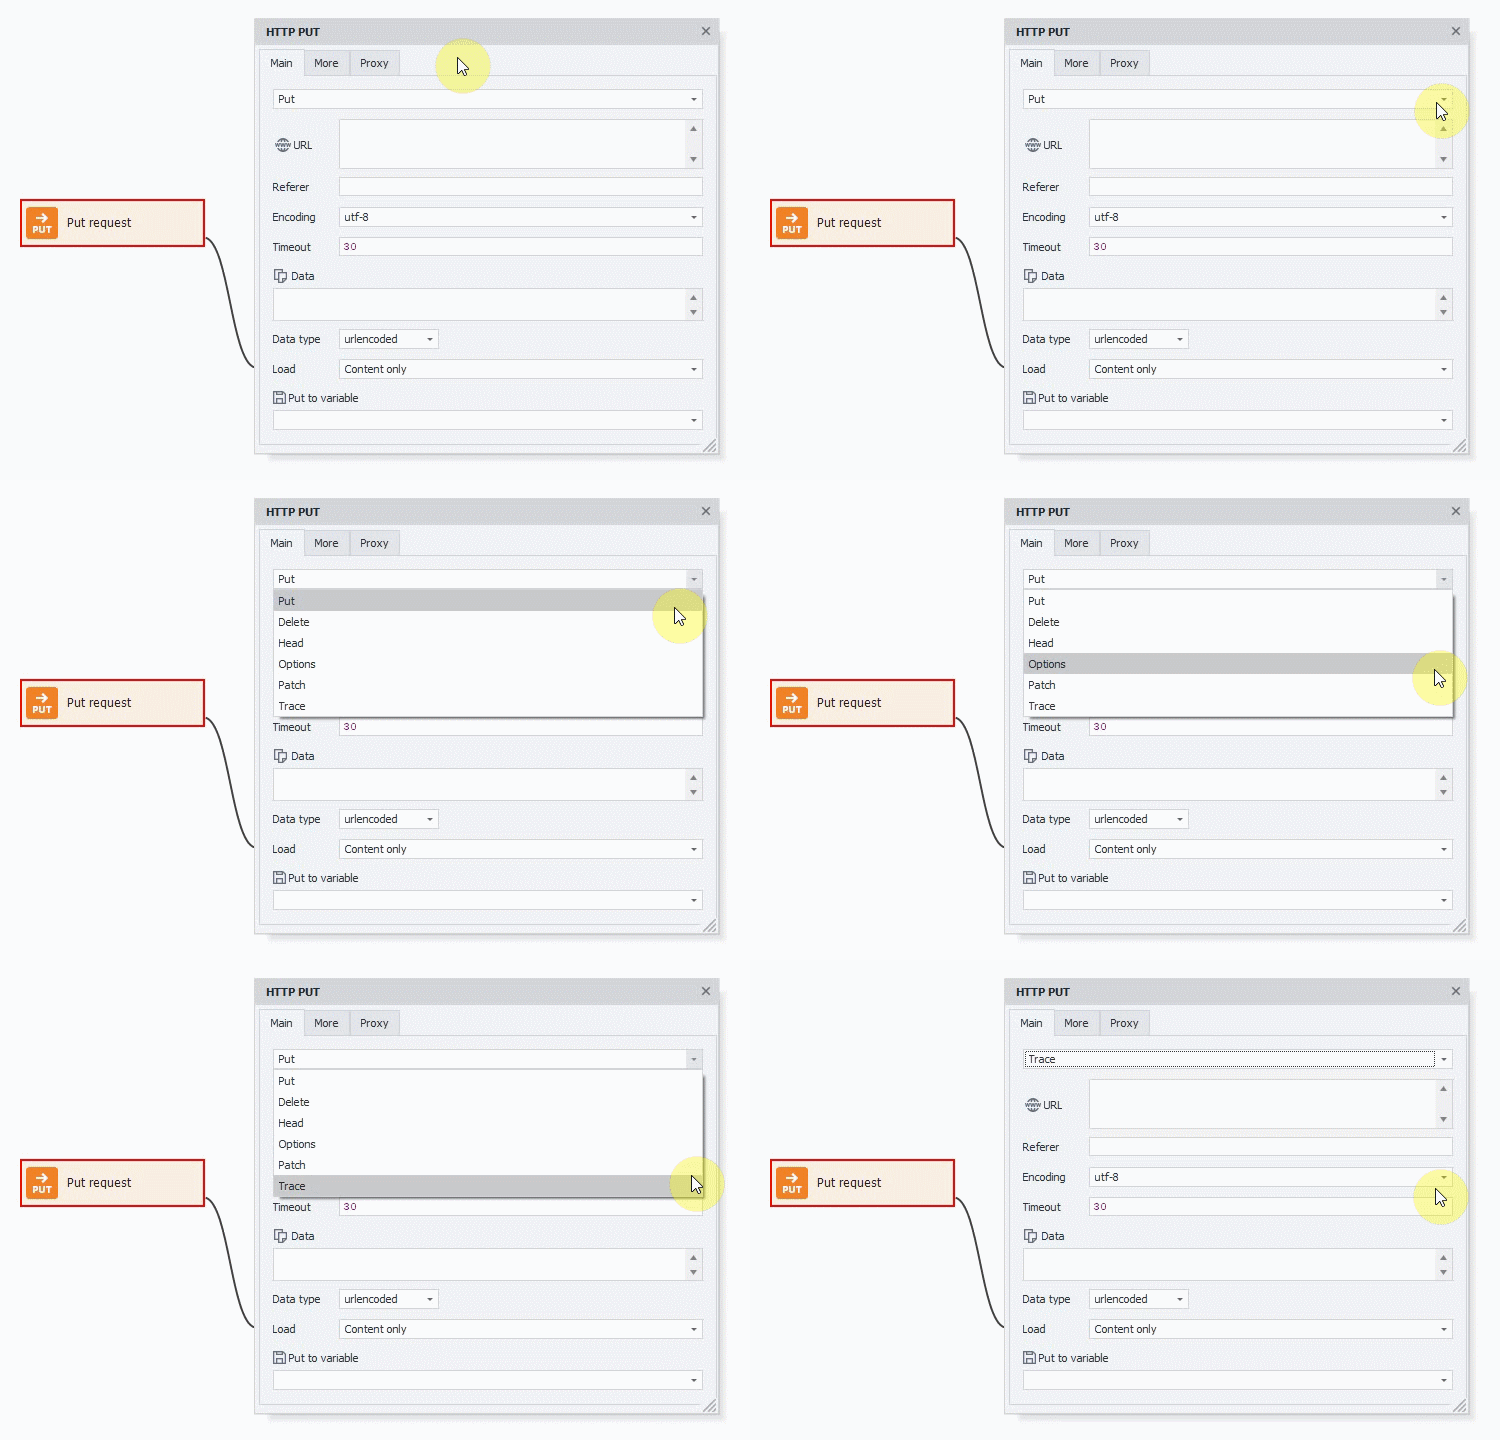
Previously such queries as PUT, DELETE, HEAD, OPTIONS, PATH and TRACE were only available from C# code. Starting with this version you can execute any of these HTTP methods with a single action - HTTP requests.

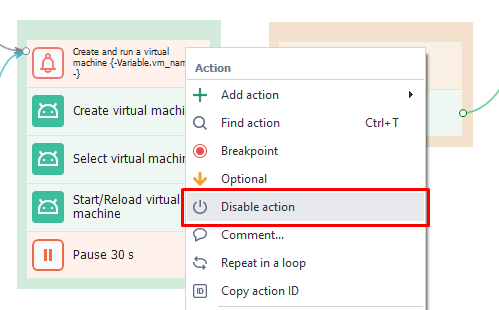
We have added the ability to disable the action in ProjectMaker via the context menu. In this case, the action is gray and does not participate in the project execution (even in ZennoPoster).

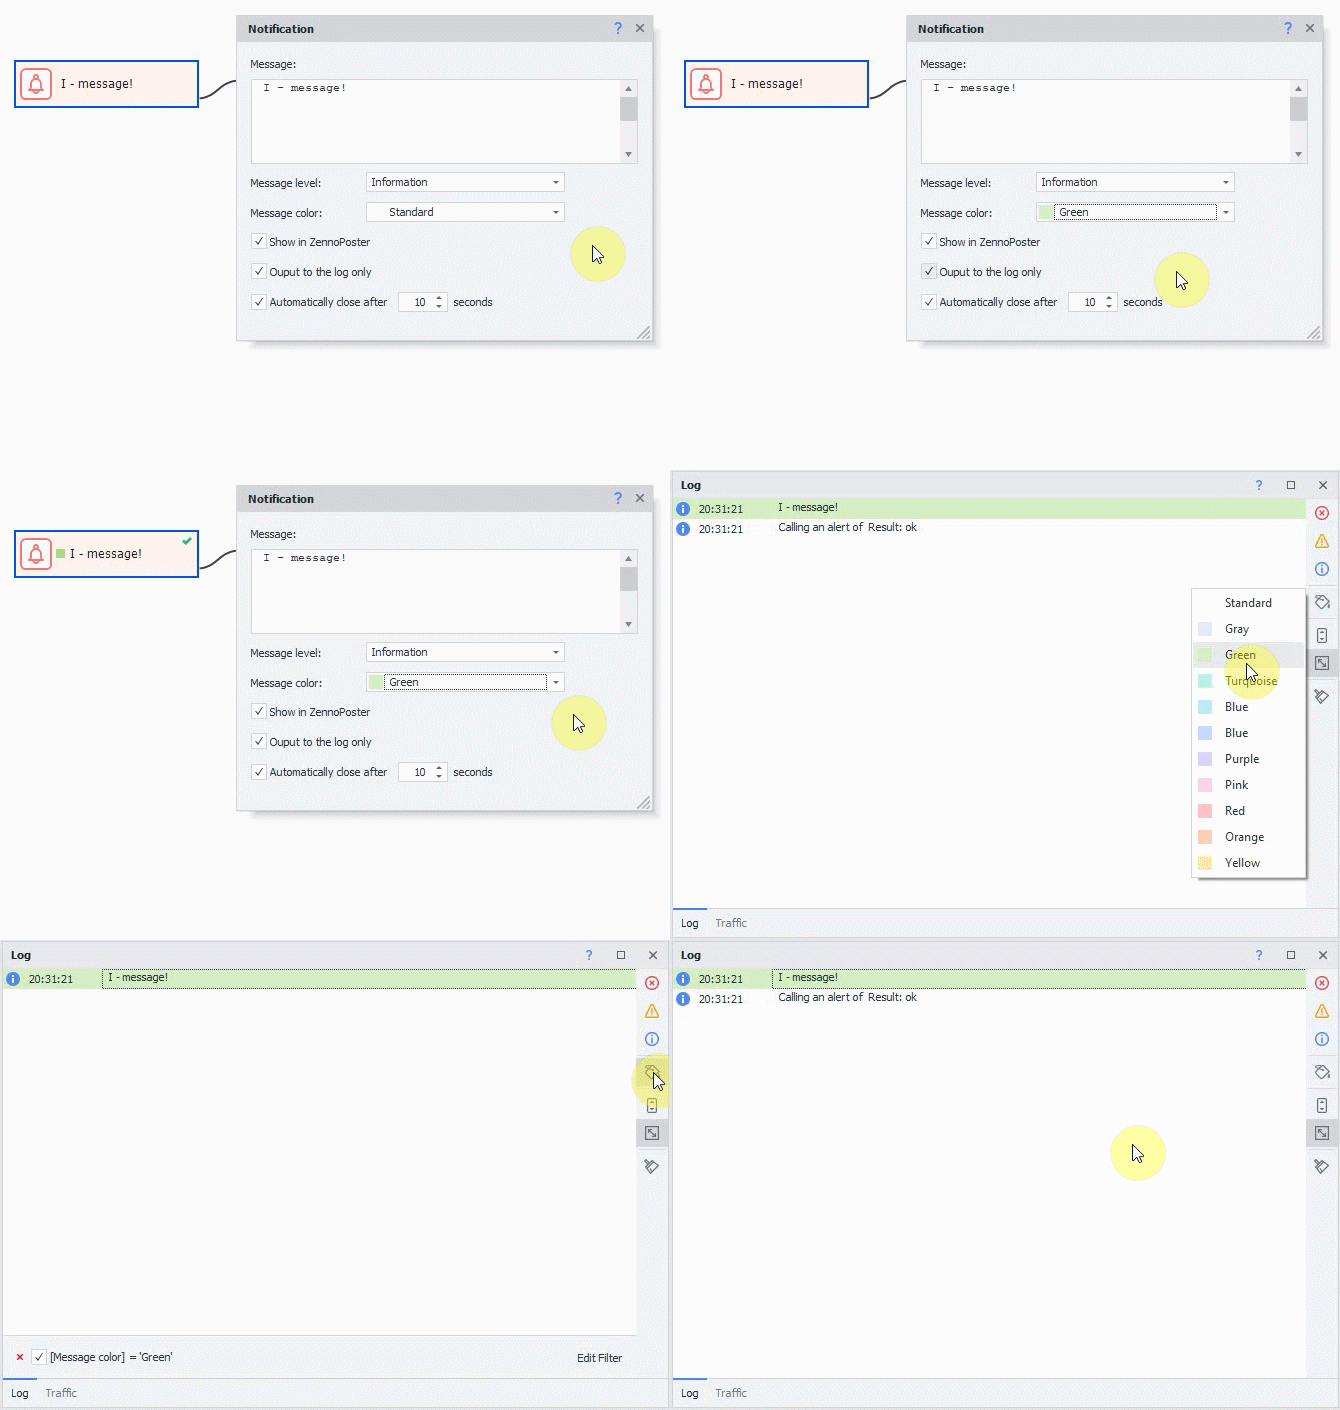
In the «Notification» action, you can now specify the color of the message. Moreover, we have added color filtering in the log window.
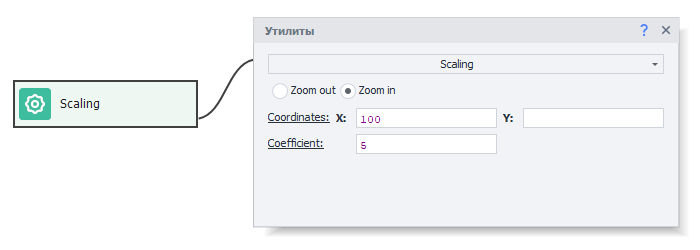
New action: Scaling
Control the zoom in apps by emulating the movement of two fingers on the screen. The new action is located in the Android → Utilities → Scaling. To configure it, you need to select the action – zoom in/zoom out, and specify the coordinates you need to perform scale. By default, it is the center of the screen.
The coefficient characterizes the scaling power. The more, the stronger the effect. The default value is 1.0.
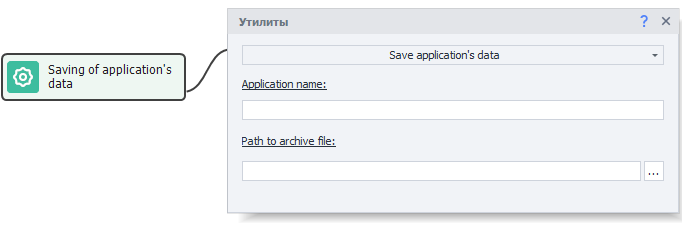
Ability to save and restore application's data
Save the user data of the app (session, cache), which stores all the authorization data of the app (profile). Such backups have a small size, which allows you to create many accounts and use them on 1 emulator, just saving and restoring sessions.
The new action is located in the Add Action → Android → Utils → Save application's data and restore application's data.
The new action is located in the Add Action → Android → Utils → Save application's data and restore application's data.

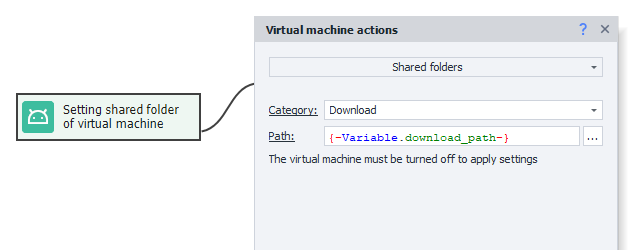
New action: Shared folders
Assign your own path to the download, music gallery and video directories. The new action you can find in the Android section → VM actions → Shared folders. To apply the settings successfully, you need to perform an action before starting with VM.
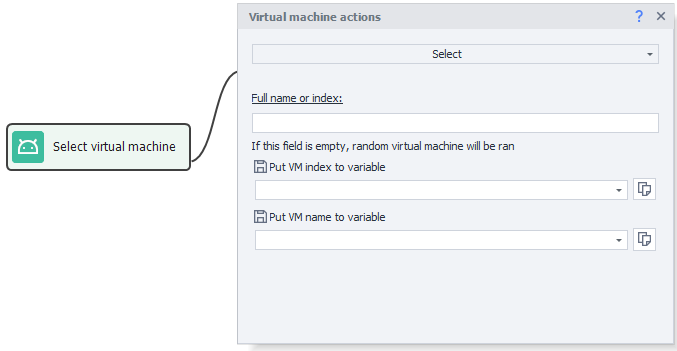
Save the index and the name of the VM (Virtual machine) to a variable
Save the VM name or index to a variable for further tracking on the next launches.
The new action is located in the Add Action → Android → Actions with virtual machine → Select.
The new action is located in the Add Action → Android → Actions with virtual machine → Select.
Choose the language of the system
We’ve added the ability to choose the language of the emulator (en, ko, de, ja, fr, ru, es, pt, hr, cn, sr, it, cs, th, in, pl, tr, uk, ar, vi, fil).
The new action is located in the Add Action → Android → Actions with virtual machine → Set language.
The new action is located in the Add Action → Android → Actions with virtual machine → Set language.

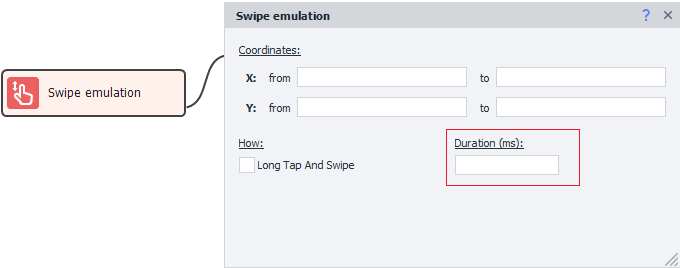
Option to adjust the duration of the swipe
The new action is located in the Add Action → Android → Swipe emulation.
The duration of the swipe is specified in milliseconds.
The duration of the swipe is specified in milliseconds.
Последнее редактирование модератором:
